This is a no news item in reality!!! It seems that a Futaba is a Futaba as far as range is concerned. I thought we might see a difference as the T6K is distinctly older tech than the T10J.
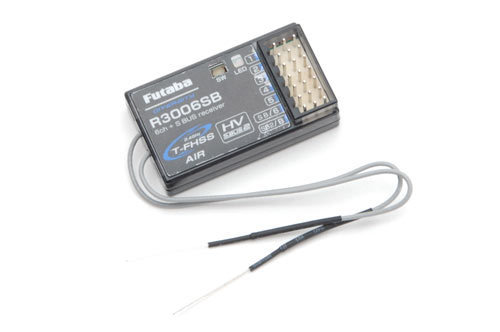
This morning I ran up the T6K Futaba with R3006SB Receiver in a glassfibre hull (IOM) with the lid on …. in the same position as all the other tests.
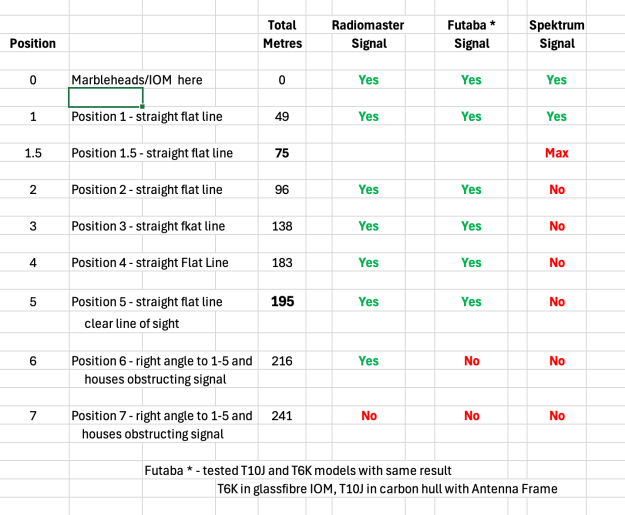
Within about a metre, the T6K/R3006 radio gave identical range to the T10J/R3006 – in the same league as Radiomaster TX15 with a ceramic aerial ER3Ci Receiver. On a straight line of sight, you can go a jolly long way. Let’s call it 200 metres.
As the boat today was a glass fibre IOM (K2) there was no need for an antenna frame – the beautiful SailboatRC pot has threading holes to position the antennae appropriately.
A few days ago we wrote about the impact of RC Flying on receivers and how we might think about them in Radio Saling’s confined spaces. First a look at some of our choices:-
This is the dinky little Radiomaster 3 channel ELRS receiver, much favoured by our Commodore, Phil. Seriously compact little thing… you might be inclined to mount it eg on velcro on the back of the unit as photographed. So the important thing in this discussion is that the connecting leads (as you can see in the photo) will stick out at right angles to this surface.
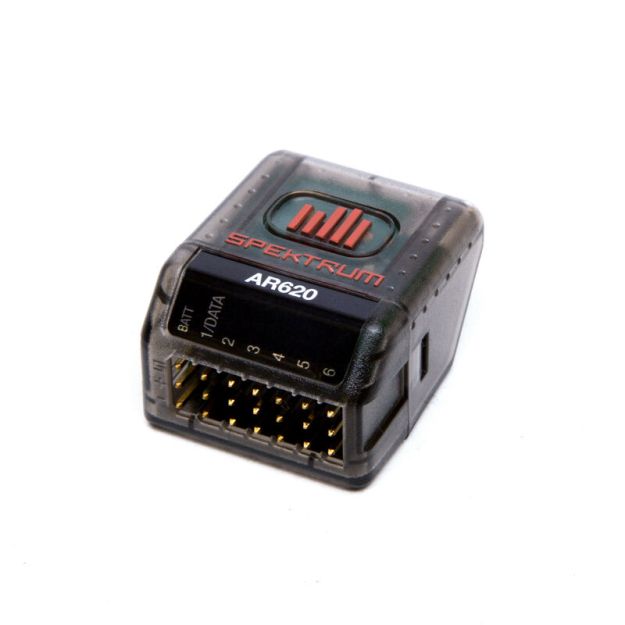
Next one is the Spectrum AR620 much favoured by Craig and Rohan. Six channels and in reality hardly any larger than the ELRS above. But note : you probably will have you velcro pad at the bottom face in the photo above, and consequently your sockets will stick out parallel to the mounting surface and not at right angles. Great for flying wing planes to permit mounting inside the wing (see first article). Really the unit is so diminutive, in radio sailing it’s no issue where you put it.
Before I illustrate photos of the two current Futaba receivers that are most relevant, I may ask if you know the depth of your receiver “pot”? As I recall, the new Proteus design is “pot-less” which is interesting. In the two boats I have here, the SailboatRC pot is 105mm deep and the SailsEtc pot in my Marblehead is 80mm deep. Keep that in mind for a minute.
Two of the current common Futaba receivers are these :-
This is the six channel R3006SB receiver – note the sockets are at right angles to the mounting surface.
This is the 8 channel R3008SB receiver – note that the sockets are in-line with the mounting surface. So by the time you wiggle your two or three plugs in here, you end up with quite a long unit.
This is the R3008SB mounted in the 105mm deep SailboatRC Pot. Plenty of space and the factory have chosen the put the electrical connector end lowest in the boat. Interesting. It would be possible to install the same receiver inside the 80mm deep pot – just about… but unless you invert it, the plugs are going to be quite close to a bilge water threat. I have been wondering of plugging in vertically like under a little umbrella is actually good for repelling water…. I’ve no idea !!
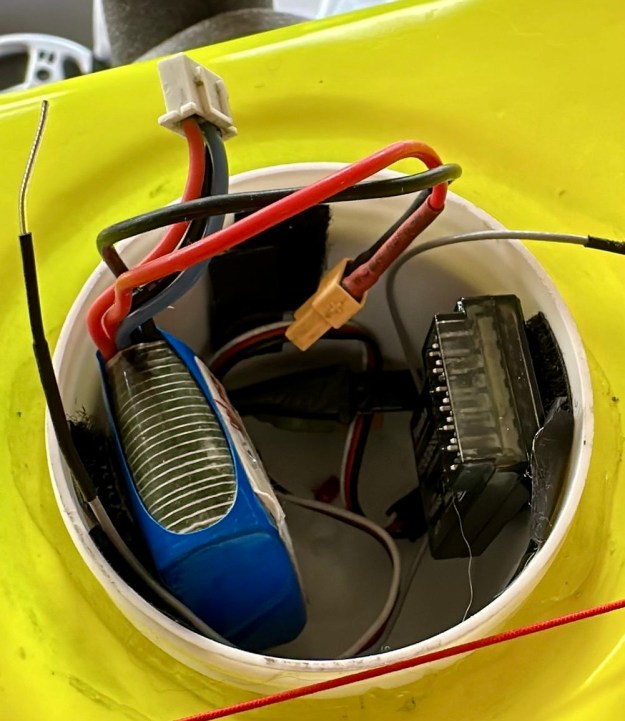
So if you are using a normal SailsEtc pot, you might prefer to consider the six channel R3006SB (with plugs at right angles) and secure that in the pot as high up as you can… quite probably with plugs at the top so they are as far away from a bilge water threat as possible. Here is that receiver installed in Nigel’s F6 – can you see what I mean??
I have been considering acquiring another Futaba Transmitter soon – prices are keen at the moment. However, my model shop in common with many now sells you a “Combi” pack which obliges you to take the transmitter with an 8 channel R3008SB receiver. It comes directly from distributor stock, not theirs. I really want to buy from my local man, but it looks like I might have to get a transmitter-only price from somewhere and buy a six channel R3006SB receiver separately alongside. So far (at the time of writing – March 2025) I have managed to find “Inwood Models” who sell from their own stock (keen price) and do list the receiver components separately. Might be the answer….
You can find the first part of this article by clicking here
Have you just started radio sailing? You’ll be wondering how on earth the boat picks up radio signals from the unit you hold in your hands. Well, the answer is that the boat has an onboard “receiver”. This article is written to be a “quick guide” to your receiver.
The receiver in the photo above is very common. It’s the Futaba R3006 model which, I think means it can handle up to six channels. Look closely and you’ll see six rows of pins (numbered in blue, if you look closely) in that cream colour recess. For radio sailors, we generally only use two channels, so if the receiver has six channels, or eight channels etc, it is really only a passing interest for us.
This little radio receiver needs power which it receives from your onboard battery – in this photo via that little red plug in the background. When you first get your transmitter and receiver, they need to be “paired” if the factory didn’t already pair them before shipment, It’s just like “pairing” your mobile phone to your car. There’ll be clear instructions in the transmitter manual on how to pair devices.
Now each of those little rows of pins also corresponds to joysticks and controls on your transmitter. Each has its own channel. You will see in the photo that only two rows of those pins are plugged. The top row, channel one, is always for your rudder and talks to the left-right movement of the right hand joystick. We plug the winch for the sheets into the third row of pins, which corresponds to the up-down movements of the left joystick.
What about aerials? See those two little grey wires sticking out of the left side of the unit in the photo? That’s your aerials, right there. They are only around 10cms long each. They say that they are most effective when the two wires are at right angles, but really if you can arrange that then great, but in radio sailing probably “don’t worry”. We all have them inside our hulls – we don’t wind them up the rigging or anything like that.
They say that in drones the range can be 1500metres which amazes me. As we normally sail around maybe 200-250 metre ranges you’d think we’d be fine. You do sometimes see boats going out of range though. If batteries are low, then there are going to be realistic limits.
When you buy a new transmitter, most likely you will select to buy one with a matched transmitter. If you buy previously used kit, just make a point to ask the pervious owner if he is including the transmitter (often not), and including the receiver. It’s not expensive, so you just want to know before you buy.