Category Archives: Rigging

Classic Beginner’s Problem – “My Prodder Has Fallen Off!”

Got a swing rig?

You’ll know what I mean by “prodder”. It’s a little bar which is there to help the forestay stand off and clear of the other gubbins at the top of the forward triangle.

If you say, “it cannot come off” or “you cannot lose it” I entirely agree. But when you’re a beginner, all sorts of mad things can…. just happen. Anyway, I’ve no idea how it came off, but it did. Obviously something I did but I just cannot imagine it.

Can you see? A stainless steel tube should locate on that simple hole in the mast. I tried to stuff the prodder back into that hole for a minute or two, but it was obviously the wrong idea.

What do other people do? Well it seems that Sailsetc have some clever little brackets that are ideal when you are building the rig – just slide them over the tube.
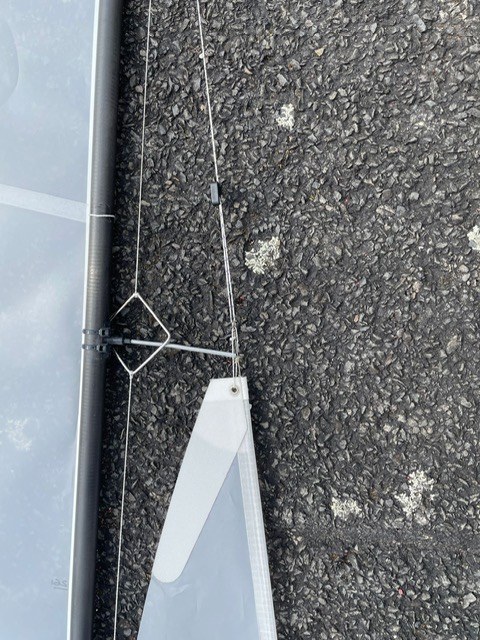
Not bad actually. I like fixings I can see and understand. Sailsetc say though that if the rig is already built, you may need to split the fitting and squeeze it over the mast tube. I was less keen on that. Apparently some people also form a cord loop at the end of the prodder and tie it around the mast. I can understand that too.

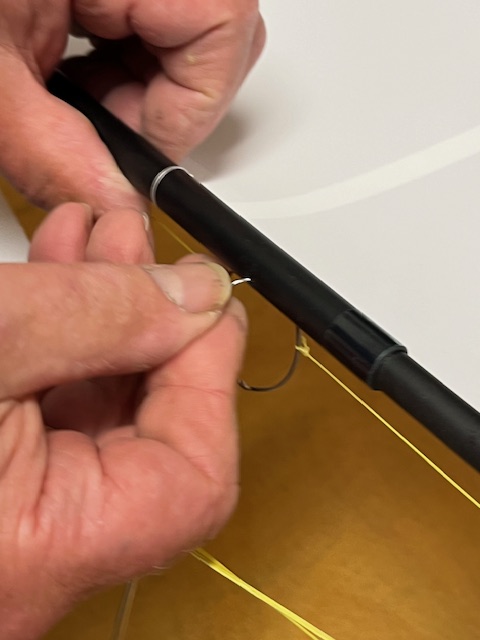
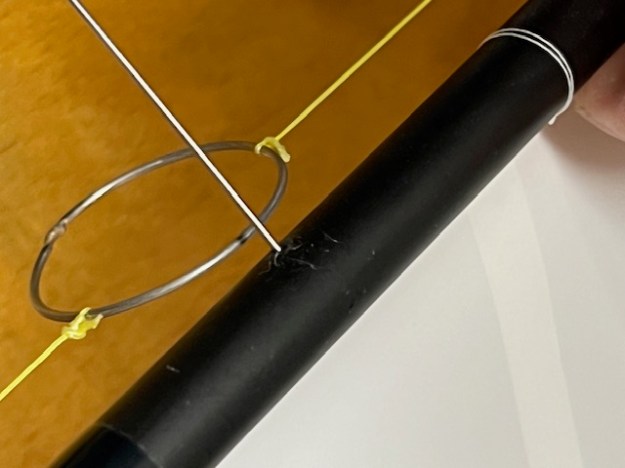
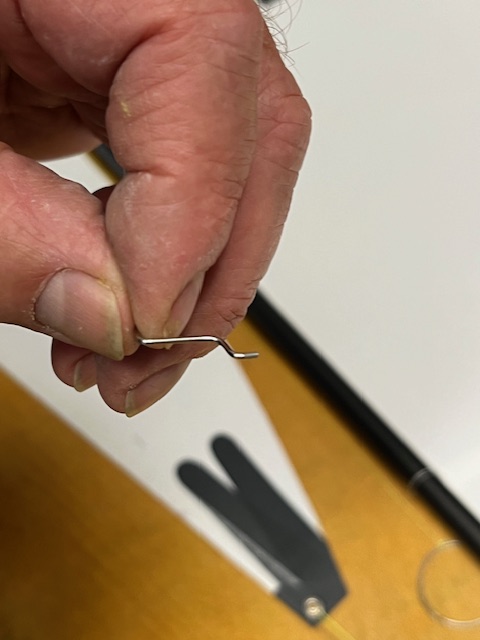
I instead gave the problem to the clever chaps at K7Yachts. In no time, I could see the answer. A hand made stainless hook, made from 0.6mm wire, that you wiggle into that hole. It need a little kink in the end to grip the inside of the mast tube. The rest of the wire rod sticks out of the hole, and it is cut off at about 2cms length. Then simply slide the prodder over that. Voila!! (see below)
There seems t one a choice of whether the prodder is perpendicular to the mast or the forestay. (I’ve no idea how to work that out!)

Anyway – really impressive fix. Light weight, clean windage etc

Rig Tension – What Does That Mean in Radio Sailing?

When we all decide to come to radio sailing, one of the first things that grabs our onshore attention is people staring down masts with their knowing one-eyed look, tweaking stays with their sturdy race tuned fingers … and making clever approving noises. It’s great !

The curve of the mast is an interesting topic in itself. If you search Youtube for IOM videos you’ll hear experts looking for anything between “dead straight mast” to “a bit of prebend”.

Baffling, but fear not!!

On Nigel Barrow’s excellent website, he recommends a rig tension gauge by John Gill. It looks like this…

The sharp-eyed amongst you will notice John’s email address on the gauge if you want to contact him to get one. It’s a lovely carbon fibre thing – I just love it. Anyway, as Nigel points out, if you want to demystify your rig, get one of these.

If you are a keelboat sailor in your past, you’ll immediately recognise the basic idea. If you’ve had a Loos Gauge in your history, it is basically the same idea. I raced `Flying Fifteens for 25 years – the Loos Gauge is the central calibration measure for everything. I never went anywhere without mine. Honestly.

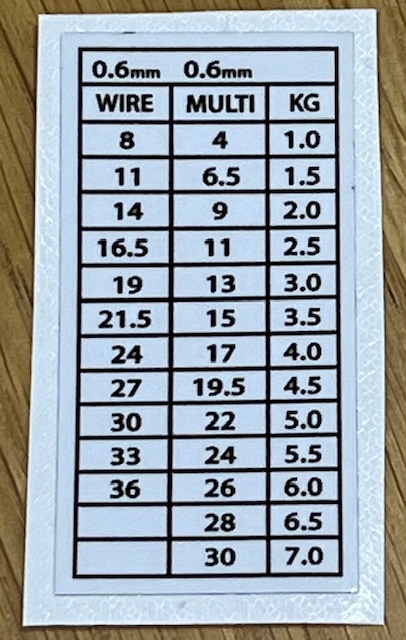
See those two big screws at the top of the gauge? You slide your shroud wire between those two (they stand proud) and the gauge gives you a way to understand rig tension versus deflection. Then you look up the gauge reading on a little chart, and if you know your wire diameter then you can read your tension in kgs.

We used to do the same in Flying Fifteens, but I soon lost the appetite to know tension in kgs … all you need to know is what the damn gauge number is.

©John Gill

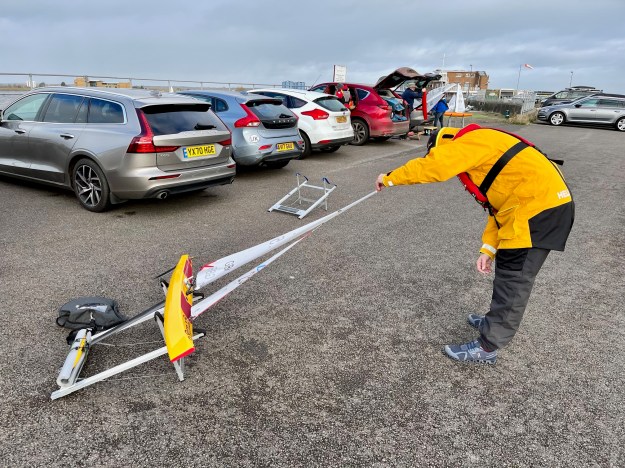
If you look at John Gill’s photos above, you’ll see the way to use the gauge. (a bit blurred, sorry)

As Nigel Barrow points out, it’s quite a revelation to know precisely if your IOM shrouds are carrying the same tension, or you pop a new replacement shroud in and you want to get the tension matched again. Very good.

In 2024 I set myself two other goals:-

  • I want to get a feeling of also what backstay tension readouts correspond with apparently good performance
  • Now what about Marbleheads? No shrouds…. But actually rig tension is a very black art in the Marblehead, and there must be a way to shine some light into my darkness. I want to write separately about measuring jib swivel tension on a Marblehead – but give me time.

Calibrate, calibrate, repeat, repeat…. my New Year Resolution for 2024

How to Neatly Finish Your Rigging Lines

When you get your first radio sailing yacht, inevitably when you look around the rigging, you are going to wonder how owners very neatly finish off their lines with a very abrupt knot

If your mainsail is secured to the mast via fine rope eyes, take a look at how they are finished. Let yourself wonder, “how do they do that?”

I borrowed an IOM to try and get started, and had to ask the Fleet Captain how it was done. He used two basic bits of kit.

1/ Put an overhand knot to finish the line/lines. It’s easy to slide an overhand knot along and get it in exactly the right place.

2/ Use Superglue over the knot head to LOCK it down. Wet your fingers first – you don’t want to end up glued to your IOM or Marblehead, like one of those ‘Stop Oil’ protestors. Let it set.

I bought from WH Smith, this pack of three mini tubes of superglue. I reckon if you buy a single larger tube, one day you’ll be desperate to use it and it’ll have set like a rock or just gone off.

3/ The next challenge is to remove the tails on the other side of the overhand knot.

If you cut with a scissors or knife, it just won’t be perfect. It might even wriggle out of the knot over time, or leave a fraying end line.

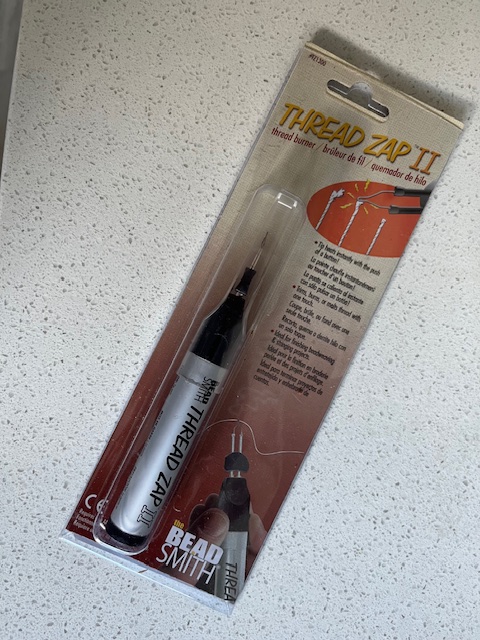
So try one of these ‘thread zappers’ in the photo above. I don’t know what kind of handicraft uses these. It’s basically a battery powered hot knife on a small scale. You just place the hot tip on the thread/s close up to the waste side of the knot. Press the button and it melts the cord off with an immaculate finish.

Very cheap on Amazon. I carry one in my toolbox all the time now.