
Nice Fleet on Sunday. Nigel dominant and Marblehead two day open meeting coming soon!

Nice Fleet on Sunday. Nigel dominant and Marblehead two day open meeting coming soon!
When you get going with your radio sailing, just occasionally you are going to need to replace your deck patches. The trick to make positioning them easy is the use a washing up liquid solution just strong enough to leave a film across the surface before you apply. Then you just need five hands to get them on – ha ha ha !!
Have you thought about how cut a stock of new patches? Rolls of sticky back sailcloth in all sorts of colours are available from the likes of Sailsetc
https://www.sailsetc2.com/index.php/deck-patch.html
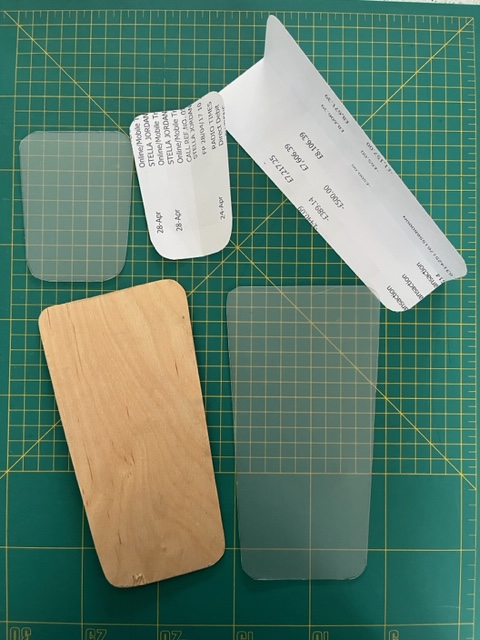
Then you need some templates. I found that to cut templates in thin ply is insanely challenging to get precisely right, symmetrical, even corners etc. So in an attempt to find a way forward, I asked my expert seamstress wife how a dressmaker would approach the problem. The answer is that you go through an intermediate paper pattern stage.
(See photo) To get the symmetry and corners to match, fold the paper in the bow to stern axis down the middle. Then make your marks, cut it out and test it on the boat hatches. Re-do this as many times as you need to get the angles, sides and corners just perfect.
We decided then to transfer that shape to sheets of plastic off the back of an old A4 notebook (see the item on “Rig Trimming Tool”….used the same plastic sheet for this) Something thin enough to cut accurately with a scissors, but last a jolly long time in wet conditions and lumpy toolboxes. …Trace the paper pattern on to the plastic sheet, cut with the scissors and you have your template. Easy!! Should last longer than the boat!
We have written in another website article where to source computer cut vinyl hull numbers. (I used “Vinyl Letters Ltd”).
There’s a trick to putting them on. See below.
For the IOM, and I think all the international classes, the minimum height allowed is 20mm. The numbers arrive on a strip about 25mmx80mm, nicely spaced and so on – which for our application is irrelevant. They were only about £2.50 a strip, so I ordered two strips, assuming I would wreck at least one number.

Honestly, I didn’t think the four digits would fit around the curve. I cut the strip into individual numbers and worked it that way.
Now you know the “hack”, do you?? Wet the surface first, before applying the letters, with a mild soapy solution – water and dishwashing liquid. You don’t want neat fairy liquid, but when you smear it on the surface if to the naked eye it runs off, then it’s too weak. Add a few more drops of soap to the mix and try again. Eventually your smear will stay on the surface.
Then one character at a time, sticky side down, you’ll find you can attach them and slide them around to get them in the desired place. Then just leave them to dry out. Hopefully you’ll find them 100% stuck on.
