Tag Archives: deck patches

Beginners Guide to Applying Deck Patches and Hull Numbers…!

This is something that every radio sailing newcomer will worry about the very first time they encounter it … Natural enough!

First let’s separate application of Hull Numbers and Deck Patches.

Hull Numbers :-

These are delicate little pieces of tape and you’ll want a gentle way to apply them. The safest and most effective we found was to use the famous trick of water mixed with washing up liquid. You really need to have this mixture highly diluted. The way to know if you have the correct dilution is that you want just enough soap that when you apply the mixture to the deck it leaves a smear – a constant, uninterrupted, watery film. If the surface tension leaves you with little rivulets and dry patches, then you don’t have quite enough washing up liquid in there. We are talking of tiny amounts of water and soap here – maybe a tablespoon or two of water a a few drops of washing up liquid..

Remember – this will take at least overnight to dry in quite a warm room, but the upside is that you get plenty of time to wiggle the numbers around on the slippery surface to get them looking their best.

Deck Patches :-

Deck Patches are altogether more robust and you get more choices of how to apply them. Basically dry application, water based application, or with soapy water.

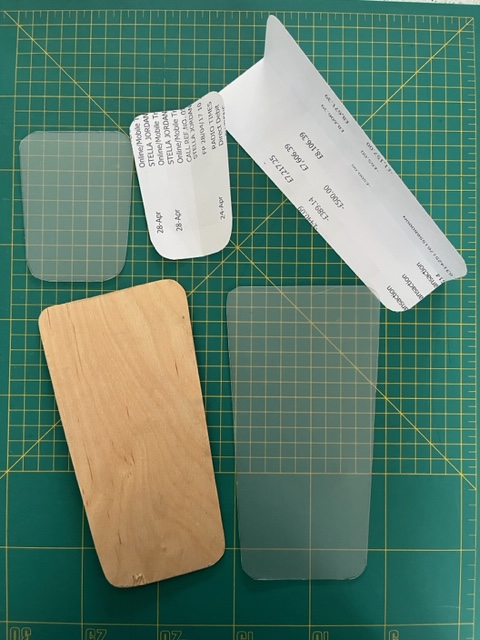
It helps a real lot to get the patches cut accurately and you can read our earlier article about this here. If you get a new set of patches with the boat, make a traced paper copy for your records straight away.

For myself, I have tried (1) dry application (honestly quite tricky and on Race day most likely this is how you will do it….). (2) Soapy water as in the section above on Hull Numbers – easy, but needs time to dry.

I had not considered just using water, but have you seen this super little video on applying patches with water from Zvonko??

Hidden in the middle of this video, Zvonko makes a surprising assertion that Black Patches and White Patches are better at keeping moisture out than the other colours.

Interesting – I’d not heard that before, but Zvonko is Zvonko (!!) – it’s as if a god speaks to you directly !! You have to pay it some attention. 🙂

Then this is Zvonko’s video of how to apply patches in the dry… the key benefit being not needing time to dry off.

You’ll want to practice this for yourself … in a private, soundproof room with a swear-box to hand.

How to Cut Your Deck Patches on a Computer !!

As a newcomer, I must say that I am pleased to cut my patches, so far, with a scissors… ..and it had never occurred t me that you might be able to do it online.

Interested??

Here is a short conversation that came up on the Datchet Radio Sailing WhatsApp Group. (I used to think I was good with Tech until I met these Guys!) :-

Person A : Anyone got any experience of laser cutting/ engraving devices??
I want to cut deck patches etc and maybe some balsa wood so don’t think I need much laser power, but a big enough bed is more likey to be important to me. Anything else I should be thinking about..?? 

Person B: Using a vinyl cutter is a simpler and better solution for cutting deck patches .

Person B : Laser cutting with a small CNC/Laser 3018 cutter is a slow process, even cutting balsa wing ribs, for example. Very smelly, as well. Cut patches with a vinyl cutter.

Person A: Any recommendation for a vinyl cutter model to pick ?

Person B: I use silhouette cameo. Easy set up and you can transfer files between friends.

https://www.silhouetteamerica.com/featured-product/cameo

Person A: Does the Cameo handle the roll of patch material or do you need to cut it into manageable sheets first ?

Person B: The cutting mat is 12” sq (American!) as standard with a 12 x 24 also available. I stuck the leading edge of my roll onto the cutting mat and allow it to move with the cutting mat. Your maximum size is governed by the physical size of the cutting mat.

Person C! : I use an old Roland CM24, that I got on eBay. It has a 600mm wide bed and can cut any length you like off a roll.

Deck Patch Templates – The Easy Way !

When you get going with your radio sailing, just occasionally you are going to need to replace your deck patches. The trick to make positioning them easy is the use a washing up liquid solution just strong enough to leave a film across the surface before you apply. Then you just need five hands to get them on – ha ha ha !!

Have you thought about how cut a stock of new patches? Rolls of sticky back sailcloth in all sorts of colours are available from the likes of Sailsetc

https://www.sailsetc2.com/index.php/deck-patch.html

Then you need some templates. I found that to cut templates in thin ply is insanely challenging to get precisely right, symmetrical, even corners etc. So in an attempt to find a way forward, I asked my expert seamstress wife how a dressmaker would approach the problem. The answer is that you go through an intermediate paper pattern stage.

(See photo) To get the symmetry and corners to match, fold the paper in the bow to stern axis down the middle. Then make your marks, cut it out and test it on the boat hatches. Re-do this as many times as you need to get the angles, sides and corners just perfect.

We decided then to transfer that shape to sheets of plastic off the back of an old A4 notebook (see the item on “Rig Trimming Tool”….used the same plastic sheet for this) Something thin enough to cut accurately with a scissors, but last a jolly long time in wet conditions and lumpy toolboxes. …Trace the paper pattern on to the plastic sheet, cut with the scissors and you have your template. Easy!! Should last longer than the boat!